Here are some of our all time favorite recipe’s we have featured over the years. These are five must try recipe’s to make over the Thanksgiving holiday.
Enjoy! Jim B
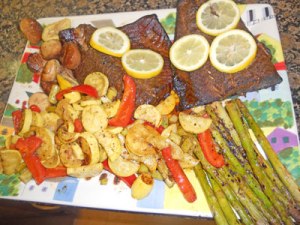
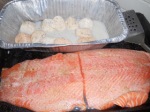
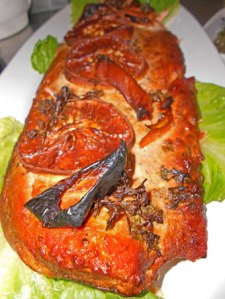
Applewood Smoked Salmon and Scallops
This is an amazing dish to go along with your smoked bird. An awesome surf and turf!!
Ingredients:
*You need fresh Salmon and Scallops.
*Fresh Lemon and Orange slices and wedges
*Butter
*HickorySea Salt
*Elephant Garlic
*Fresh Herbs
*Beer, wine, and water for steam in smoker.
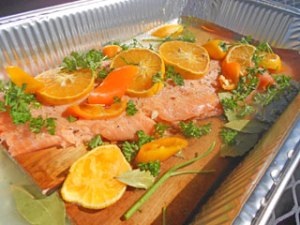
This is a pretty easy recipe that is hard to screw up. Take some Salmon and Scallops and do a light marinade with them. I use a little butter and lemon juice with some crushed elephant garlic. For seasoning us some hickory sea salt, cracked pepper and some lemon pepper. Lay sliced lemon ad orange over top of the filet. That is about it.
Prepare your smoker with a mix of apple and cherry wood. Smoke for two hours but make sure there is plenty of fluid in the basting pan in the smoker. I use also some wine and fresh herbs in the water as well. Gives a great flavor and aroma.
Next grill up some asparagus and some fresh mixed veggies. I did the veggies in a cast iron skillet and they were fantastic. Just pan sear them with a little olive oil garlic and cracked pepper.
This is just a fantastic dish that is easy to do and makes for one great summer meal. Try it! You for sure are gonna like this one!
*****
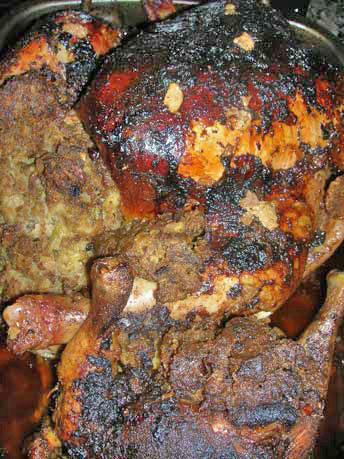
Brined Turkey
Brined, Cajun Injected, Beer Butt Smoked Thanksgiving Turkey
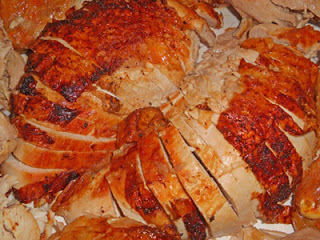
If you like a LOT of flavor in your Turkey and also one that is super moist, this is one of my recipes you have got to try. This combines all of my favorite cooking tricks including: Brining, Injecting, Smoking, and steaming aromatics.
First off you need to do JB’s brineing method which is simple and healthier than traditional brineing. Start with water, enough to cover your bird in a pot. Take out the bird and add to the water 1\2 cup of salt and 1\2 cup of sugar. This recipe uses about half the amount of salt in typical brineing. This will reduce the sodium content some of which for a lot of us is a good thing. Also add two cups of Cajun Creole sauce and three large elephant garlic cloves, some fresh cracked peppercorns, chives and some crushed red pepper. The last ingredient is one cup of apple cider vinegar.
Before you put the bird back in the brineing pot, inject the Turkey with some Cajun Creole Butter sauce. Then, place bird in pot to get ready for the fridge.
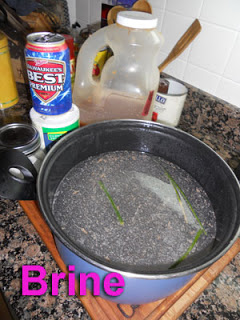
Place the Turkey back in the pot and refrigerate over night. Usually I like to brine just fresh Turkey breast, not the entire bird. This is just easier all the way around. This Turkey is also a bird that I will serve on the side for dinner. A lot of people only like tradition, dry, flavorless, white bird for their Thanksgiving. So, to be safe, I usually always will cook several birds. One smoked or deep fried. A traditional in the oven, and then this recipe which is my favorite.
After a good 24 hour soak, dump the brine and wash the Turkey. Next, get your beer butt holders ready with beer and your favorite spices. I like garlic, franks red hot sauce, vinegar and chives. Put it all in the beer can with some beer and stuff it up the Turkey cavity. When cooking with beer cans stuffed in either Chicken or Turkey, take some chef scissors and cut the top off. Don’t just open the beer can, “Pop Top”. You really want to remove the top part of the can. This allows much better flow of aroma and moisture going into the bird. This also makes it real easy to add aromatics.
Before going to the grill, use your favorite rub and give the bird a good spice rub down. My favorite is Caribbean Jerk seasoning.
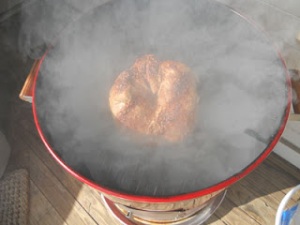
Now, prep your smoker by adding water and beer into the moisture pail, or drip pan. Also add some fresh herbs. More elephant garlic, peppercorns, etc.

Put you bird on the smoker and smoke the Turkey with Apple and Cherry wood chunks until done.
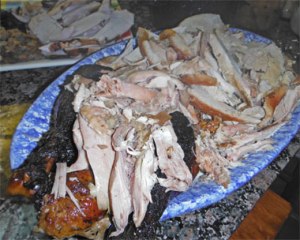
After the Turkey is cooked place it back in a container with aluminum foil with a good tight seal to it. Let sit for one more hour. This REALLY allows the juice to re absorb into the meat. The turkey will still be very warm even after an hour sit at room temp. Also, leave the skin on during the resting period. Do not take the skin off until ready to slice.
To serve, I like to cut the entire breast out in one piece per side. The
n slice down the back side of the breast. This makes for a real nice cut of meat and it is easy to control.
I don’t know of a bird that has more flavor than this recipe. My next favorite would be deep fried with different injections. With out a doubt, this tops them all and your guest will be in for a real treat. There is also nothing at all difficult about this recipe, although it does require a good smoker. If you have not gotten a smoker yet, This Thanksgiving give yourself, your friends and family a real treat- go buy a smoker. They are only around $70 bucks or so and last for years.
Try it!!!

****
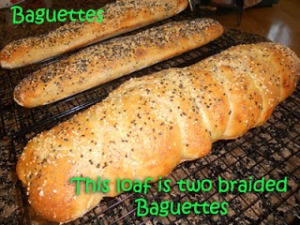
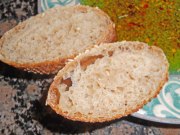
Baugh’s Baguette’s
(Made with Jim’s own Wild Chesapeake Bay Starter by the Sea!)

Baguette, French loaf, Italian, which ever you prefer, here is my full proof recipe for Baugh’s Baguette’s that will sure make a dinner party something to remember. This recipe will give you the rise, color, crisp crust and flavor that you will want.
This a great recipe that is fun to make and actually uses four different types of flour. The combination of flour makes for delicious nutritious bread with lots of rise and a nice slightly chewy moist texture. The perfect, “OMG-That’s Awesome Bread!!!!”. You will hear that a lot if you try making this.
This recipe will make three baguette’s and one loaf, 4 total
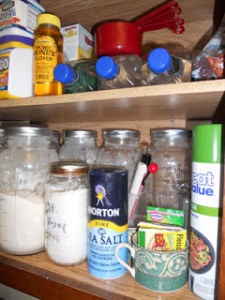
Here are the things you will need.
*Stand Mixer
*Baguette cooking loaf tray (Williams Sonoma-Chicago Metalic)
*Mixing bowl (Large)
*Starter, wild sourdough proofed (I also use KAF)
*A spray bottle full of spring water
For the mix.
*Two-cup white whole wheat Flour- King Arthur (K.A.F.) (most grocery stores)
*Two-cups bread flour- K.A.F. (most grocery stores)
*Two-cup Sir Lancelot High Gluten K.A.F (available online)
*One-cup AP (used in sourdough proof)
*One-cup Fiji water (or your fav filtered water. I LOVE Fiji)
*Two teaspoons sea salt
*Three tbls good olive oil
*Two teaspoons of instant yeast
*One egg for wash
*Poolish (it will be around two+ cups with around 100% hydration)
To Start- Day 1
First, get your wild starter out of the fridge and proof it by taking one cup of starter and add one-cup flour and 1 cup of water mix and set aside. You can let it sit overnight if you like. Mine usually sets for about four hours and it is bubbly and ready to go. (Poolish)
Day-2
Mix your Flours in a mixer bowl and mix with one cup of warm water and stir until everything is mixed, maybe just a couple minutes.. Be sure to add your poolish as well. After mixing, take off the mixer and set aside for 45-60 minutes to rest. This is the Autolyse step. (Lots of folks let rest for 30 min. I get better results with a longer rest)
*****See note at bottom of page about extending Autolyse for better flavor!!!!!
After Autolyse, put back on mixer and start mixing on low. Do this knead for about 10 minutes, while adding your olive oil, sugar and instant yeast. Continue to mix until the consistency is that not quite of a ball, but close. You do want to be able to pour the dough out of the bowl. This final knead in the mixer is when you add your salt to the dough.
NOTE:
A) I use the instant yeast to give the dough a good kick, helps to fluff up the sourdough. Not necessary, but works good.
B) Usually I will add about a cup more flour during the final mix to get the consistancy of the dough where I want it. Dont over work the dough, it should be a fairly wet dough. This dough should be somewhere arond 75%, hydration or a little higher. The longer the Autolyse the easier it is to work with wet \ slack dough.
Next, pour onto a floured work surface and hand knead \ Fold. This dough is really one that needs folding. No slamming down on the counter, throwing in the air. Simple folds working the dough gently. Knead for about five minutes or so. It may be a bit sticky because it is a wet dough, just use some bench flour. Then set in a large greased bowl (just a little olive oil) and let rise 3+ hours.
After the rise, work back on to a floured surface Kneading \ folding the dough for a few minutes then cut in four balls. Simply shape by hand and gently stretch the dough to proper length, about two inchs shy of each end of the Baguette tray.
Place each long loaf into the Baguette loaf pan with a sprinkling of flour on top. Spray top of loaf with some water from a spray bottle. Set aside in warm place and let rise for another hour and a half. You can use the warm oven trick to speed up the rise if you would like. Sometimes I do depending on my room temp.
Prep the oven and dough
After this final proof, pre heat your oven to 475 and place a water tray in the bottom of your oven. Don’t miss this step! This water tray is what will help crisp your bread and give it a nice color. While the oven is heating,–
1) then egg wash the top of the loaves,
2) then dust lightly with flour,
3) then either add sesame seeds on top, or not
4) then spray lightly with the spring water
5) lastly, score them with a Lame, (Score just before going in oven)

NOTE on scoring:
You can use a razor blade attached to a wood coffee stir. I use a razor blade carpenters tool that is a VERY long blade making it easier to score. This helps a lot. I also run some cold water on the blade and try to make quick movements. I am not master at scoring at all, but it works. I usually work with multi grain sourdough, at 75% hydration, scoring is not always easy.Also, score at an angle, not straight down into your dough.
MOST IMPORTANT-Don’t score your bread until seconds before you put it in the oven.
Score-Multigrain Baguette, Flour used-Whole Wheat, White Whole Wheat, High Gluten, Bread, and AP
Put the dough in 500-degree oven for two minutes then cut oven temp back to 425. Bake for 25-30 minutes. The water should be boiling in the bottom of the oven when you put in the bread.
Spray the bread during cooking, every 10 min. (Or two or three times during baking–Note, the more the oven door is open, the more heat is let out. Try to do two quick sprays of water and dont do the first one until after 10 min. of baking)
Once done, Thump the bread, if it sounds hollow, it is done.
Starting off with a hotter oven AND scoring the bread will help the rise a LOT! Don’t forget it!
*****Be careful when opening the oven with a steam bath, you can burn yourself really bad!! Use oven mittens and stand back to let the steam escape before you go to spray the bread with water. I also drape a cloth over my arm to protect from the steam. I learned this the hard way.
ALWAYS cool the bread on a wire bread rack uncovered for 1\2 hour. Then store or serve.
Cool on racks for at least 30 min before serving or storage.
I usually will let set for 45-50 min.
Day 3–ENJOY!!!
I highly suggest to try a meatball sub using this bread. Also use a round small cast iron skillet to make round Italian bread for sandwiches, just awesome. Nothing impresses company more than a couple of large Baguette’s sitting on the dinner table on wire racks with a red checkered cloth draped around the base. Some red wine, and you are well on your way for one awesome dinner party! Enjoy!
NOTES:
* Sometimes I will add honey into the flour mix and adds a nice flavor and a touch of sweetness. Also you can use all white flour if you like. Adding the whole wheat is better nutrition and flavor, in my opinion.
* You can simply put your dough ready to bake on a cooking pan with some cornmeal and bake. If you do get the Baguette cooking trays, you will like them a lot. They help form the bread however help in the cooking as well. The trays have holes throughout the pan allowing moisture from the water pan to really help crisp the bottom and sides of the loaf. They also make a nice slightly perforated pattern on the bottom of the bread. Real nice! (We got ours at Williams-Sonoma)
* Always have everything at room temp, even the yeast and eggs for the wash. I will usually even heat my mixer bowl by running hot water in it then wiping it out before I start mixing. The sponge should be at room temp as well, of course. Pre heat your oven just for a few minutes to knock off the chill, then use your oven to rise the dough. There will be no drafts and a good warm place to let the yeast do it’s work.
* EXTENDED AUTOLYSE. For better structure and a lot better flavor in your bread, try an extended Autolyse and a longer overnight cool rise. This will also make the wet dough easier to work with. The developed Gluten strands help the structure and flavor a lot. Here is what you do.
A) Make your poolish from your mother jar and set in a large bowl.
B) Add the flour to the bowl and mix just a minute. You want it to be a very wet batter, so you may need to add 1\2 cup of water or so.
C) Once the quick mix is done, set aside for four hours.
D) Then put back on the mixer and add salt, yeast, sugar and mix only for about five minutes. Once done, roll out and knead on the counter. Just a few folds should be necessary.
E) Put the dough in a large bowl and put in fridge overnight. (let rise at least an hour first)
F) In the morning, take out the dough, get to room temp., fold the dough on counter few times.
G) Then, shape the loafs as you would like, using whatever pans you would like.
H) Now, let rest for another 90min.
Follow the rest of the recipe- score, egg wash, dusting flour, seeds, bake in spiked oven for two minutes, then bring temp back down to 425.
Extended Autolyse is something I do if I have time the afternoon or evening the night before prior to baking. Works great and does make a difference. The flavor is quite unreal.
Here are a couple of pics of an extended Autolyse. Wild Sourdough whole wheat Baguette:
Four hour Autolyse
Ovenight rise
Warm rise next day another four hours
Formed loafs, raised another 2 hours.
Then baked.
Some of the best tasting ones I have made yet!
Multigrain Baguette-Whole Wheat Flour, White Wheat Flour, Sir Lancealot, Bread and AP
Garlic Bread Version of Baugh Baguette’s
Here is our Baugh Baguette recipe for Garlic bread! Very good and easy. Same recipe as above however do the following.
* Set aside three tbls of dried roasted garlic and hydrate with a little water for 10 minutes then drain. Next add some olive oil to keep the garlic moist.
* During your last fold on the final proof, insert garlic slices in the middle of the bread. Also add a little garlic powder and parsley flakes throughout the center.
*Fold the dough over to complete the Baguette.
*Let rise again for 1 1\2 hour then bake.
I like to top the Garlic bread with Poppy and toasted Sesame Seeds. This makes for a fantastic Baguette that goes wonderful with any Italian dish.
Baugh Garlic Baguette. You can see the roasted garlic in the center of Baguette.
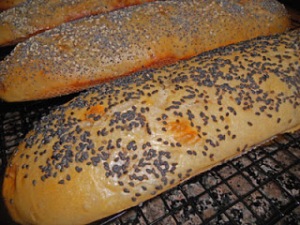
Try a sandwich with one of these and you will never go back!
****
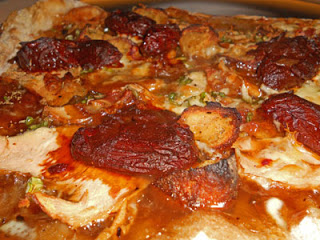
Turkey Pizza, Grilled – Deep fried with Chipotle Peppers in Adobo Sauce .
I am not sure if this has been done before, but it sure was a new one for us! This Thanksgiving I was in charge of Saturday night Pizza night and made some traditional pies, however came up with one pie that was a good way to use some delicious Leftovers. Deep Fried grilled Turkey Pizza!
First up, you need some good deep fried Turkey. We deep fried two birds and had plenty for leftovers. The birds were rubbed down with a Cajun spice and fried for 45 minutes. We sliced the turkey for the Pizza very thin and made sure there was no bone or gristle, fat, etc. Just pure lean white meat from the breast.
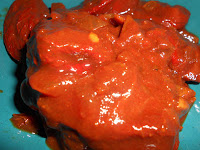
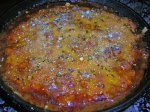
Sauce- for the sauce I decided on a nice brown mushroom gravy, this was a good choice for sure. Certainly worked well with the Turkey and Oyster Stuffing.
Dough- I made my standard King Arthur Neo-NY Pizza dough that did take three days to make. I used KAF High Gluten, Bread, and Whole Wheat Flour. It is a slack dough, high moisture content that has a long fermentation and is made with our wild sour dough starter.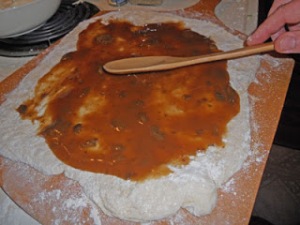
Oyster Stuffing and Bacon
For toppings I used some fresh oyster stuffing balls \ chunks from our Turkey Dinner and also cooked up some bacon and cut up in small pieces. We then took a bunch of spring onions chopped them up and used them to put on top of our cheese, which was mostly fresh shredded Asiago and Parm. (No Motz)
At the last minute we came up with the idea since this pie did not have a lot of “Zing” was to add Chipotle Peppers that were packed in a Adobo sauce. This was a great idea and tasted good, however it did spice up the pie probably more than we intended. The peppers were the last to go on so for those that did not want the spice, it was easy to take off.
We grilled up the pie on our Pizza stone and the finished Turkey Pie was really pretty good. Next time I will probably tone down the pepper spice a little bit by pre cooking them. But all in all, a good tasting pie that was a lot of fun and everybody enjoyed it.
Good Turkey Pie!
****
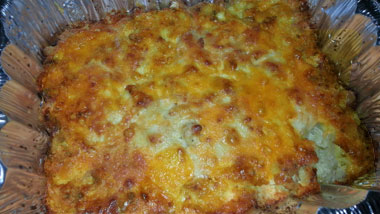
Three cheese mac & cheese
This is a fav of my daughters, it is pretty simple but just don’t be trying to count calories while enjoying this dish. You will need:
Stick of butter
Flour
Onion
Milk and whipping cream
Egg noodles
Parm cheese, white cheddar and extra sharp cheddar
Salt and pepper
Make a roux with the butter flour and onion. Then add one cup of two cps of milk and ½ cup whipping cream. Bring to a boil. Add cheese and stir until melted.
After adding pre cooked al dente elbow or shell noodles, pour the mixture into a high sided casserole dish and back for 3 min at 350.
The last 15 minutes cover top of dish with an additional layer of sharp cheddar cheese and sprinkle parm on top as well.
When finished, serve hot alongside smoked turkey with oyster stuffing and gravy.
Start your diet the next day.
NOTE: you can really kick up the mac and cheese fun by adding either lobster or backfin crabmeat into the mix. If you happen to have these I abundance and can get cheap locally, do it. Do not use a heavy flavor like oysters, etc, but lobster and backfin crabmeat does work really well in making a seafood version of mac and cheese.
Happy Thanksgiving everyone. Enjoy!!
Jim Baugh


